How to Customize the Branding of Your Photo Booth (Vinyl, Screen, and Print)
Compartir
A photo booth without its own identity is just another piece of furniture in the room. The one that truly makes guests stop, queue up, and share the photo on social media is the one that carries the brand of the person who sets it up: the couple's name, the company's logo, or the exact theme of the event. Personalizing the branding is not an aesthetic whim: it transforms a generic service into a recognizable experience and, for those with a photo booth business, it’s the reason a client hires you again.
Why Photo Booth Branding Matters as Much as the Equipment
The equipment may be identical to that of the competition, but the customer's perception depends on the visual details surrounding the experience. A photo booth with worn vinyl, no welcome screen, and a generic printed copy conveys the opposite of what is sought in a wedding or a corporate booth: care and coherence.
There are three layers where this coherence plays out, and it's best to work on them together, not separately: the exterior of the booth (vinyl), the screen that the guest sees before and during the session, and the printed copy that they take home.
1. The Vinyl: the First Impression
Adhesive vinyl is the quickest and most reversible way to customize the exterior of a photo booth without touching the original casing. It allows the same equipment to be adapted for each event without purchasing new furniture.
What to Include in the Vinyl
- Logo or name on the front, at eye level for those in line.
- Color palette consistent with the wedding or the client's corporate identity.
- Event hashtag, if available, in a visible yet discreet location.
- Minimal instructions ("tap the screen to start") only if the booth's design doesn't make them clear on its own.
Common Mistakes with Vinyl
The most common mistake is overloading the booth with text and icons until it’s no longer clear what is being offered. The practical rule is simple: if the vinyl cannot be read in three seconds from three meters away, there is too much information.
2. The Welcome Screen: the Moment When the Queue is Decided
Before the guest presses the button, the screen is already communicating. A well-designed welcome screen serves two functions: it confirms that this photo booth "is for this wedding or this brand" and provides the exact instruction for the next step.
Recommended Elements on the Screen
| Element | Function |
|---|---|
| Names or logo | Confirm what event it is |
| Date | Reminder and context for the final copy |
| Large start button or icon | Reduce usage friction |
| Brand colors | Visual coherence with the rest of the setup |
This is where the photo booth software comes in: platforms like Snap360 allow you to upload overlays and custom screens without relying on a designer for each event, which is especially useful if you manage several setups per month.
3. The Printed Copy: What Goes Home
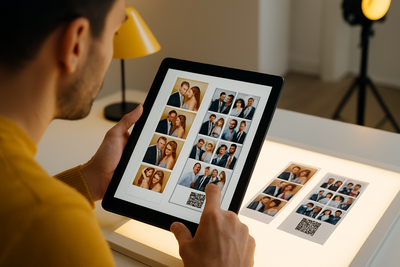
The strip or the 10x15 copy is the only physical element that survives the event. If the design of the copy doesn’t carry the branding, the effort to personalize the vinyl and the screen loses much of its meaning, because no one is going to hang the vinyl on the fridge.
What Should Not Be Missing from the Print Template
A discreet frame with the name or logo, the date, and, if applicable, a QR code linking to the event's online gallery. The rest of the space is for the photo: the cleaner the frame, the better the design ages.
Customization According to Event Type
Weddings
At a wedding, branding revolves around the couple's names, the date, and the color palette of the floral decoration. It's advisable to coordinate the color of the vinyl with that of the linens or centerpieces so that the photo booth doesn’t clash with the rest of the setup.
Corporate Events
Here the logo takes precedence: exact corporate typography, brand colors without variations, and often, a tagline or campaign message on the welcome screen. The printed copy usually also includes the company's social media channels.
How to Organize Customization Without Wasting Time per Event
- Create a base vinyl template with interchangeable areas (name, date, hashtag) instead of designing from scratch each time.
- Save screen and print templates as reusable projects in your photo booth software, changing only text and color per event.
- Have neutral accessories and props on hand (frames, lights, props) that match any palette without needing to buy new pieces for each order.
When to Renew a Photo Booth's Branding
If the business operates with the same booth for multiple clients each year, it’s wise to review the vinyl each season: edges lift, colors fade in the sun, and an aged image conveys the opposite of what you want to sell. A clear sign that it’s time to renew: if in the photos from the last event the vinyl looks more worn than the rest of the props.
Quick Checklist Before Each Event
- Does the vinyl have the correct name or logo for this event, without remnants from the previous one?
- Does the welcome screen load the corresponding template before the first guest arrives?
- Does the print template include the correct date and, if applicable, the updated QR code to the gallery?
This small check prevents the most awkward mistake of all: delivering a copy with the wrong name or date because a template from another client was reused without updating it.
Conclusion: The Brand is Noted in the Details that Repeat
Customizing the branding of a photo booth does not require a complete redesign every week: it requires a coherent template system in vinyl, screen, and print that adapts quickly to each client. If you are setting up or renewing your equipment, check out our selection of 360 photo booths and accessories to build that system from the first event.